Dean & Deluca

Showing posts with label Dining in. Show all posts

Saturday, May 28, 2011

How to Make your Own Chicken Gyros


Lettuce, tomato, onion—staples of any fridge—can entertain you far beyond a sandwich, my friend.

With so many vegetables and so little time before they all went bad, I wanted to create something delicious enough to trump the sandwich, impressive enough to earn some street cred, and simple enough so that I could eat rather soon as I was starving. I decided to construct my own gyros, which would require nothing more than whipping up a quick tzatziki dressing before essentially throwing all the contents of my fridge into a pita.

The Tzatziki:

First, pour 1 cup of your favorite plain Greek yogurt into a mixing bowl.


Then, cut a large cucumber into two halves. You can wrap up one of the halves and put it back in your fridge. Take the second half and cut it in half length-wise, exposing all the seeds.
If you are crafty with a knife, carefully carve out the seeds. If not, you can use a spoon to hollow out the cucumber.

Next, dice the cucumber. You can do this by turning the cucumber so that the hollowed-out side is facing down. Cut thin strips length-wise, and then take your knife and cut perpendicular across the strips.


Toss the cucumber into the yogurt along with about 1 teaspoon of finely chopped dill, 1 teaspoon garlic powder, ¼ cup feta cheese, and mix.


Voila. Tzatziki without a blender.


The Chicken:

Slice a chicken breast into thin strips. If you are using frozen chicken, it may be easier to slice the meat while it is still a little frozen.
Once the chicken has been defrosted and sliced, season the strips with salt, pepper, and a little bit of tarragon (just enough to give the chicken a light yellow color).

Sautee the strips on a medium heat setting, making sure that every strip has access to the bottom of the pan without being overcrowded, or else you will not get nice browned edges.

The Gyro:

Before plating, I placed my whole wheat pita on the same pan that I used for the chicken just long enough to get a nice browning.

Sliding the pita right from pan to plate, I spread a layer of hummus onto the pita before laying down a bed of lettuce, diced onion, tomato, chicken, tzatziki, and more feta cheese.


You can fork-and-knife this bad boy, but I’ve found it most efficient to fold up the edges and just dive in mouth first.


Monday, May 23, 2011

Salmon and Smashed Peas


Sauteed salmon, seasoned with only salt and pepper, served over smashed peas with leeks, lemon juice, basil, and tarragon. Otherwise known as a delicious Monday night.

Thursday, April 14, 2011

nooch

If it wasn’t the funky tables with curved bamboo centerpieces then it was the fun menu with neon green writing that reeled me into Nooch in Amsterdam.

Although Nooch fails to provide the most authentic of Thai food, the trendy atmosphere and great sharing dishes made for a good dining experience.

Not knowing what to expect after ordering the “Chinese Pearl” appetizer, I was thrilled when four stuffed pastries arrived at the table. The “deep fried pancake” was like a miniature piecrust. The shell was very crispy, creating some difficulty upon eating, but this was a mere hiccup once I was introduced to the seasoned mushroom filling.
Sautéed soft, the mushrooms were met with shredded carrots, lettuce, green onions, oil and spices. The mixture created an explosion of flavor, especially when paired with the red sauce that tasted like Sriracha. The heat from the sauce added that perfect kick to bring the dish to the next level.

The Pad Thai was bizarre. The attractive presentation was a nice touch—a bright 
green leaf lined the white plate—and if the dish had been named different, then maybe I would have been more pleased. The fact that neither the noodles nor the preparation met my expectations of traditional Pad Thai left me slightly disappointed. The noodles were wide and the flavor was bland. I think some sliced cherry tomatoes found their way onto my plate as well, which was a little odd. Whole peanuts, instead of crushed, topped off the dish, fragmenting the ingredients rather than bringing them together.

Regardless of the underwhelming noodle dish, the friendly staff and delicious starter were enough to tempt me to return to Nooch. There are too many enticing dishes I have not yet experienced for me to write off this restaurant just yet.


nooch

Reestraat 11 1016 DM Amsterdam
+31(0)20 622 21 05

Open daily: 11.00-23.00

Monday, February 14, 2011

Easy-to-make Valentine's Day treats

Sometimes, it can be mutually beneficial to take advantage of friends who are easily impressed. My easy-to-make white chocolate covered pretzels are a snack that continually manage to astound people. I get to enjoy my new position as queen of creativity and craft while my friends get to enjoy free candy.

However, I may have allowed my ego to get the better of me. Although I usually resort to just using a microwave to melt the white chocolate (hence the easy factor), I decided to upgrade my white chocolate to double-boiler status. If you've never used a double-boiler before, then this will be as much of an adventure for you as it will be for me.

Ingredients:
  • one bag of white chocolate morsels
  • one bag classic-style pretzel rods
  • one pot
  • one mixing bowl that, when placed on top of pot, is large enough to create a seal with the rim of the pot, preferably glass or metal
  • spatula
  • wax paper
  • one sheet pan
  • sprinkles
  • paper plate
Procedure:
Essentially, a double boiler is like a makeshift fondue pot. Heat water in the pot, but do not bring it to a boil. The goal of this double-boiler process is to have the steam of the water heat the bottom of your mixing bowl, which is why you want to choose a bowl that seals the steam in from the top. So, clearly, I missed the boat with this Pyrex idea.
After a few more failed attempts using a skillet, a sauce pan, and a plate (don't question my motives), I finally landed on this bright blue mixing bowl, which I hoped was microwave-safe. It perfectly sealed in the steam and was deep enough for dipping my pretzel sticks.
Sure enough, after only a few minutes, the morsels were melted into a thick cream. I tried to better distribute the heat by mixing the chocolate with the spatula before going in for the kill.


The bowl wasn't deep enough to accomplish my preferred coverage, so I used the spatula to smooth the chocolate down the pretzel.
After letting the excess drip back into the bowl, I embellished the sticks with some sprinkles, with a plate underneath me, before placing the final pretzel sticks on a sheet pan lined with wax paper.

And, the classy line:


Happy Valentine's Day! 

Sunday, September 19, 2010

My Hotdog Bar

I am so sick of / addicted to this “Hot Dog Paradise” series that the Travel Channel has been running. They scour the nation, finding these gorgeous hotdog combinations from restaurants and vendors that are completely unattainable. Honestly, “if you’re ever in Arizona,” my first instinct would be to leave, as opposed to visiting a hotdog stand on the border.

Well, I’ve decided to fight back by satiating my craving that’s been building for six months. I assembled my very own hotdog bar.


Starting with the essentials and soon getting carried away, I ended up with nine different hotdog toppings. 
And the winners are (in no particular order): 
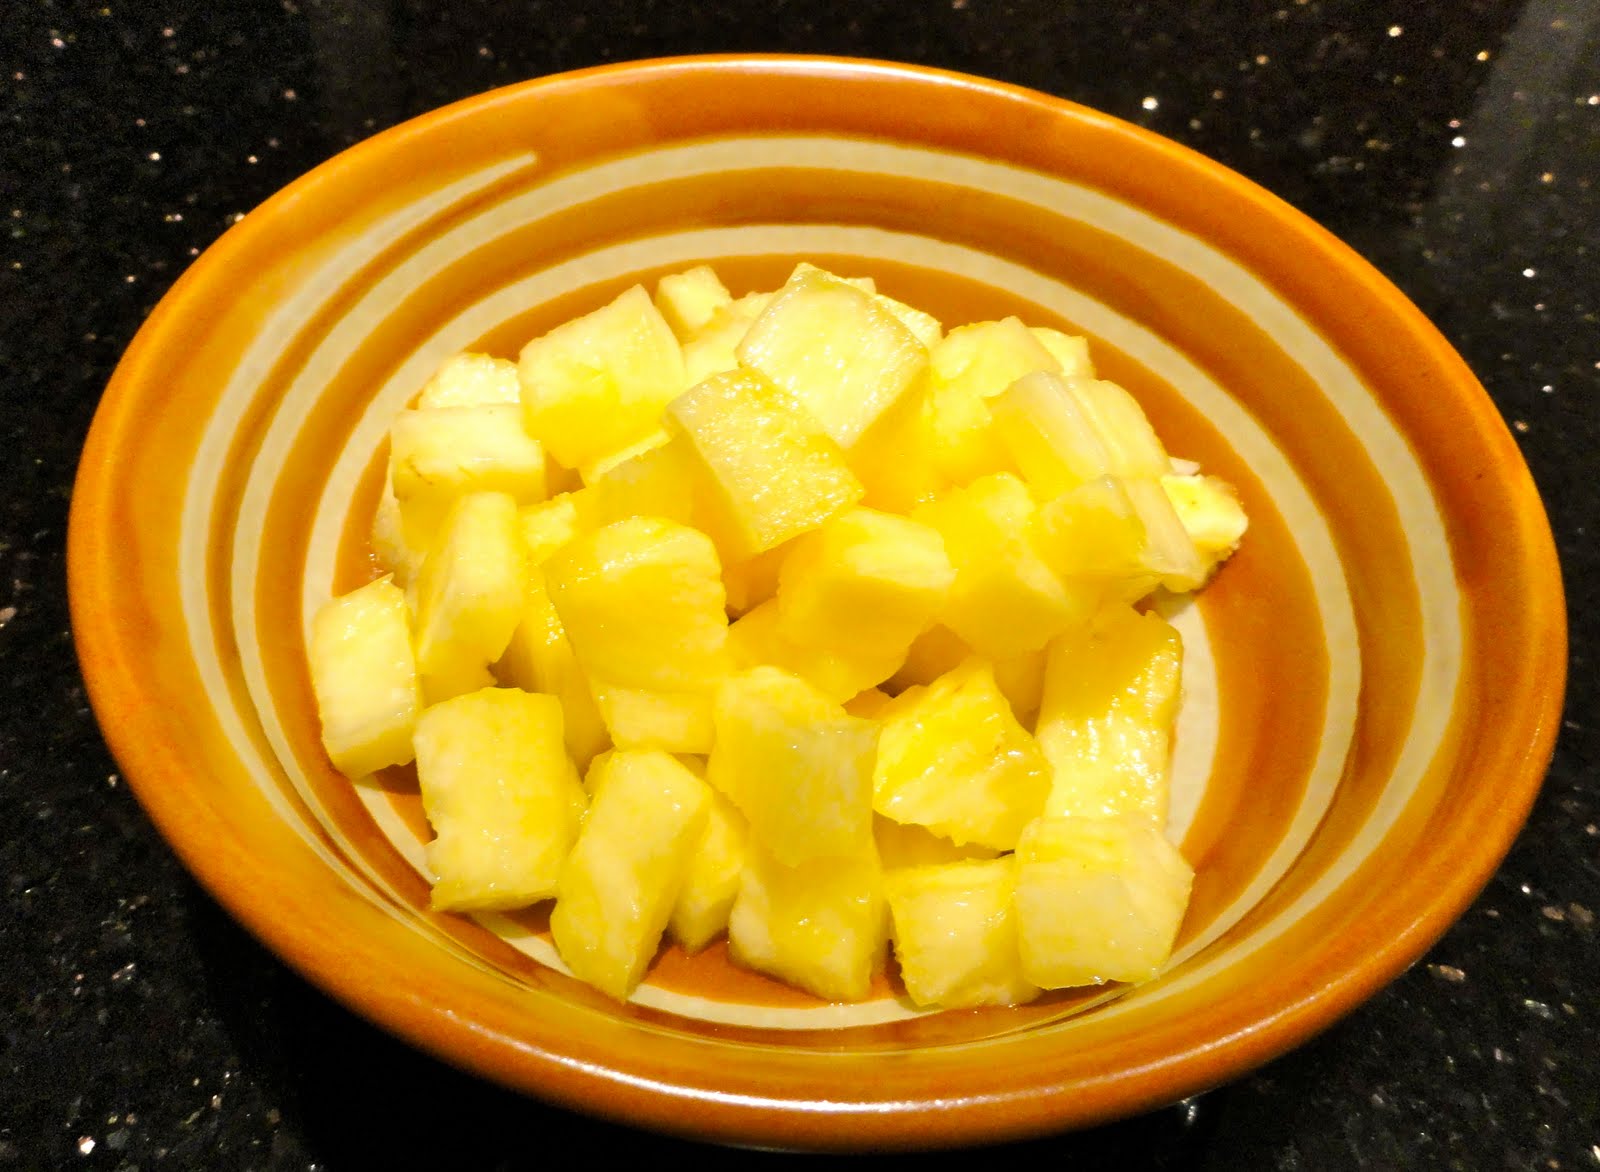
sliced pickles, spicy brown mustard, relish, diced sweet onions, coleslaw, jalapenos, avocado, American cheese, and freshly sliced pineapple. 


(And you can imagine my excitement upon finding the ramekins to go with them.)


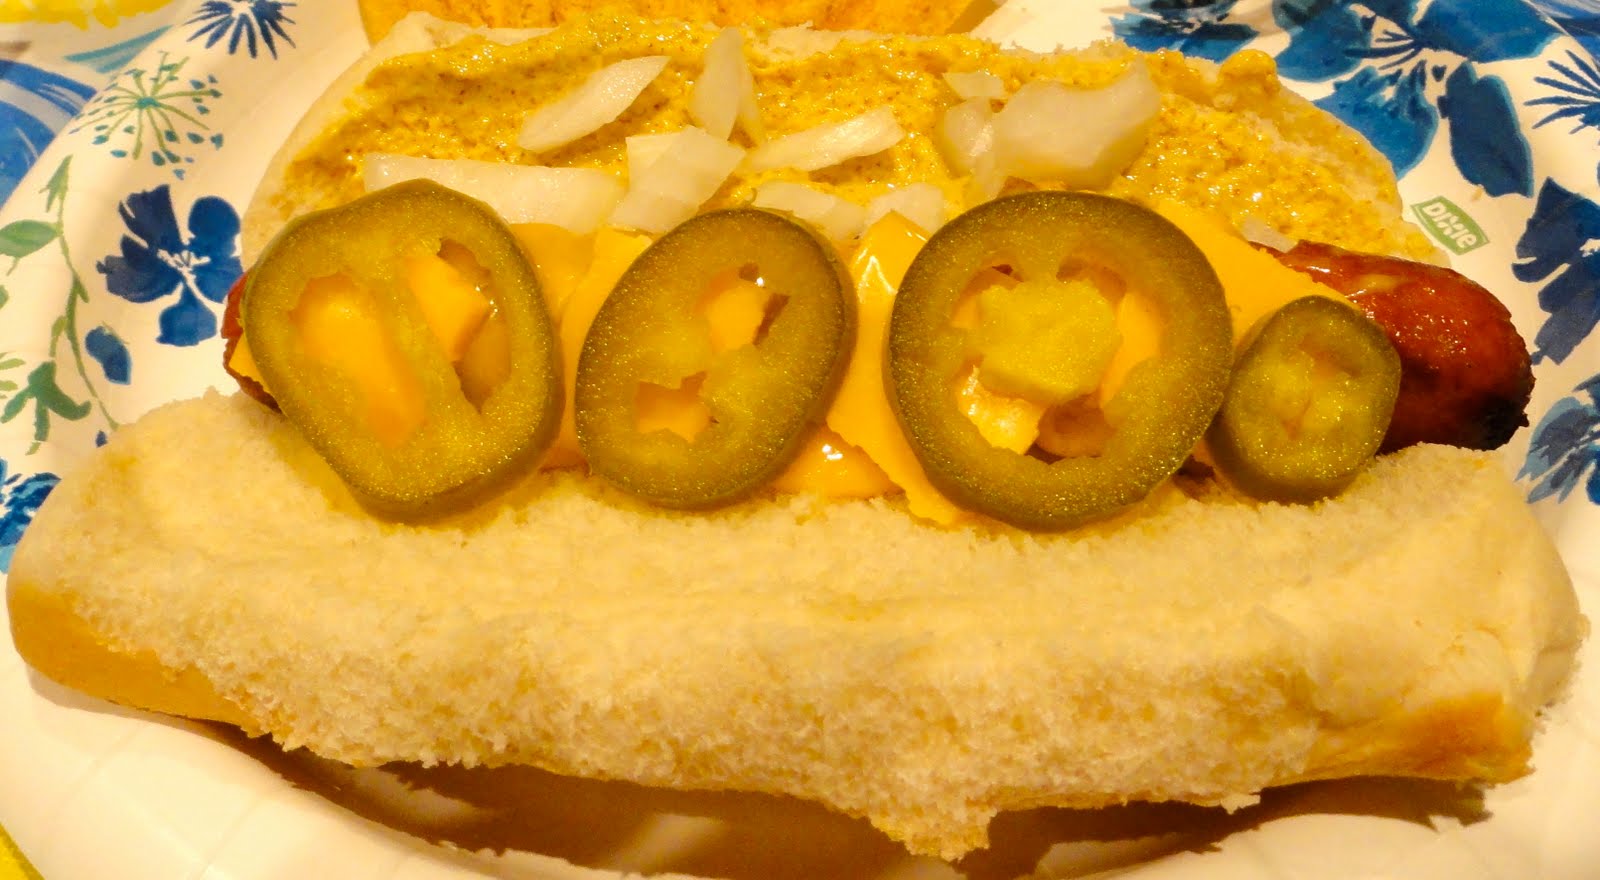
I started off with a bang: mustard, diced sweet onions, melted cheese, and jalapenos – this ain’t my first rodeo.


Another favorite was a dog loaded with melted cheese, mustard, jalapenos, avocado and coleslaw.


But the most bizarre, and surprisingly enjoyable, concoction of the night was my mix of onions, avocado, and pineapple. 
I contemplated throwing on some barbeque sauce, but this wasn’t some crappy pizza (no offense to my previous blog post). However, the sweet juice from the pineapple was just the condiment I needed to give the dog that added zing!

Saturday, September 18, 2010

Homemade Pizza Tricks

:: Disclaimer: Do not try some of these moves at home without a drop cloth ::


I recently baked my own pizza with no more training than occasionally watching Giada De Laurentiis operate a rolling pin. Using my guess-and-check-and-make-do method, I navigated my way through raw pizza dough – and a slight altercation with moldy mozzarella cheese – rather successfully.

First – a quick foreign language lesson. Kraft does not mislabel their packaging. If your bag of mozzarella has blue pieces in it, it is not bleu cheese. The blue chunks do not make your food gourmet, but rather they make you run to the bathroom. Aah, why is it that the French pronunciation always sounds so much better?

As my cheese proved insubordinate and unusable, I moved onto the dough, where I managed to tear a hole within minutes of rolling. 
Fine. I simply divided the dough into two pizzas (which soon turned into three after a similar incident) and I was back in business!

The key is in knowing when to stop rolling and start stretching the edges of the dough with your fingertips.
However, there are always those select few who refuse to just put the pin down…

Then came the dangerous part – the attempts at pizza-dough-spinning. I’m not sure as to how much this risky act impacted the overall appeal of the dough, but it truly was beautiful to watch. 
Just look at that determination.


I’d like to take a moment to direct your attention back to the photograph above so that you can fully take in what you’re seeing. Superb.

I dusted the first pie with oregano before adding the sauce, new bag of cheese, and pepperonis. As simple as it may be, this pizza won everyone over.


On the second pizza, I spread barbeque sauce, mozzarella, lightly sautéed red onions, and filet mignon that had been tossed with a little more barbeque sauce.

Out of respect for my mother, I decided it just wouldn't be right to show a photo or even discuss the contents and results of her pizza, but two pizzas were more than enough for us!

Sunday, July 18, 2010

How to Make Your Own Pancake Mix

The morning rush makes breakfast the easiest thing to miss. A great way to bypass the stress of fitting in time for food is to prepare something ahead of time. 
You can cook delicious, fluffy homemade pancakes in little time when you make the batter the night before.


Keep reading...

Thursday, July 15, 2010

Ode to Harry & David Pears


Yes, it's true, I have succumbed to the elite New-Englander hype and jumped on the $5/pear bandwagon. In my defense, the pear was free, and I was hungry. Despite my loss of pride, this pear has opened my eyes to an entirely new world of fruit.
For a long time, I've asked Harry & David fans why the pears are so special and delicious. They could never give an adequate response. So, I will.
These pears have a darker, tougher skin than most, but I've concluded that this leathery layer is necessary in order to hold the overflowing, goodness that anxiously awaits inside.
Once you break through the tough exterior, you reach a sweet and juicy realm that's too magical to be legal. The interior is soft -- not mushy -- like a network of delicate roots whose sole purpose is to provide the juice with a place to sit.
Harry & David pears don't believe in clean bites, and neither do I after tasting these little flavor capsules. I'm sorry that I couldn't provide you with a picture of its inside, but I was too busy enjoying my pear.
Click here to find a Harry & David store near you.

Monday, July 12, 2010

Ten Foods You Can Now Dip in Chocolate

Strawberries are too cliché and pound cake is for amateurs. I’ve conducted tedious, pain-staking, chocolate-covered research, and, at the expense of my love-handles, landed upon ten new foods to get excited that you can now dip in chocolate.

Thursday, July 8, 2010

Cake 5 Ways

Last week I was assigned the deliciously bizarre task of bringing 12 unfrosted vanilla cakes home from work. Mix-and-matching store-bought frosting with items found around the kitchen, I was able to create five fun and tasty cakes.

And what do you do with five carefully crafted cakes?
Well, you eat them one bite at a time.


Vanilla Ice Cream Cake

Ingredients:
  • 2 vanilla cakes
  • 2 pints vanilla ice cream
  • 16 oz. vanilla frosting
The Steps:
  1. Take the vanilla ice cream out of the freezer and allow it to soften (the outsides should be slightly melted while the center is still frozen; if you wait until the entire pint is softened, then the ice cream won’t hold its ground and it will drip off your cake).
  2. Using a knife, stir the ice cream until you get a thick milkshake-like consistency.
  3. Take one cake and turn it upside-down (this is so, when you put the second layer on top, it doesn’t topple, tilt, or slip).
  4. Spread the pints of ice cream evenly across the upside-down cake
  5. Turn another cake upside-down, frost the bottom side (the dark, flat side) with vanilla frosting, flip it back over, and place it on top of the layer with the ice cream so that the ice cream and the frosting are touching.
  6. Continue frosting the entire double-layered cake with a spatula or knife.
Peanut Butter and Jelly Cake

Ingredients:
  • 2 vanilla cakes
  • 1 jar grape jam
  • 1/2 cup peanut butter
  • 16 oz. cream cheese frosting
The steps:
  1. Transfer the frosting to large mixing bowl and add the peanut butter. With a spatula or spoon, fold the peanut butter into the frosting until they are well mixed.
  2. Take one of your vanilla cakes and turn it upside-down (this is so, when you put the second layer on top, it doesn’t topple, tilt, or slip).
  3. Then spread the jam on the cake so that there is about ¼ to ½  inch of smooth jelly surface.
  4. Take another cake and spread the frosting/peanut butter mix on the bottom side of the cake (the darker side of the cake). Set this cake on top of the first cake so that the frosting and jelly sides of the cakes are touching.
  5. With the remaining frosting, cover the top and sides of your double-decker cake with a spatula or knife.
Browned Butter Ice Cream Cake

Ingredients:
  • 2 vanilla cakes
  • 16 oz. container cream cheese frosting
  • 2 pints of butter pecan ice cream
The Steps:
  1. Take the ice cream out of the freezer and allow it to soften (the outsides should be slightly melted while the center is still frozen; if you wait until the entire pint is softened, then the ice cream won’t hold its ground and it will drip off your cake).
  2. Using a knife, stir the ice cream until you get a thick milkshake-like consistency.
  3. Take one cake and turn it upside-down (this is so, when you put the second layer on top, it doesn’t topple, tilt, or slip).
  4. Spread the pints of ice cream evenly across the upside-down cake
  5. Turn another cake upside-down, frost the bottom side (the dark, flat side) with cream cheese frosting, flip it back over, and place it on top of the layer with the ice cream so that the ice cream and the frosting are touching.
  6. Continue frosting the entire double-layered cake with a spatula or knife.
Raspberry Cream Cheese Cake

Ingredients:

  •      2 vanilla cakes
  •      16 oz. cream cheese frosting
  •      1 jar raspberry preserves
The Steps

  1.      Take one of your vanilla cakes and turn it upside-down (this is so, when you put the second layer on top, it doesn’t topple, tilt, or slip)
  2.      Then spread the raspberry preserves on the cake so that there is about ¼ to ½  inch of smooth raspberry surface.
  3.      Then take another cake and spread the frosting on the bottom side of the cake (the darker side of the cake). Flip this cake over and set it on top of the first cake so that the frosting and jelly sides of the cakes are touching.
  4.      With the remaining frosting, cover the top and sides of your double-decker cake with a spatula or knife.
  5.      As a garnish, you can place a handful of fresh raspberries on top, or you can take some of the raspberry preserves, and, with the back of a spoon, smear it on the top of your cake in a zigzag pattern.
Tri-Berry Trifle

Ingredients:

  • 2 vanilla cakes
  • Raspberry preserves
  • 1 cup blackberries
  • 1 cup blueberries
  • 4 cups JELLO vanilla pudding
  • 1 can whipped cream
  • 4 tall champagne or water glasses
The Steps:


1.     Cut your vanilla cakes into about ½-in. x ½-in. cubes and place a small handful of the cubes at the bottom of each glass
2.     Pour 1 tablespoon of raspberry preserves on top of the cake in each glass
3.     Pour 2 tablespoons of pudding on top of the preserves
4.     Sprinkle about ½-cup of a mixture of blackberries and blueberries
5.     Repeat steps 2-4 once more and top with whipped cream

Monday, July 5, 2010

New Cheeses for our Macaroni

Mac n’ cheese – the beloved comfort food that warms the hearts of people ages 6 to 60. Whether you’re boldly ordering it off the kid’s menu or secretly forking it off of your child’s plate, you’re a loyal macaroni patron and you deserve to change up the cheese every once in a while.

So break out the macaroni, and please, for all of us, put the Velveeta away. Here are some tasty, new ways to make your noodles happy. So, get prepared. This ain’t your mama’s cheddar.

There are almost too many ways to make mac n’ cheese, and it’s basically impossible to go wrong. So, before you start, you must narrow down the options. You’ve got your tangy and your creamy, there’s the thick and then the steamy, not to forget the baked and of course the stringy.

Sunday, June 27, 2010

Foods that Take Longer to Eat


For most of my countless hours spent snacking, I’m not actually hungry, I’m just eating. Can you relate?

This wonderful phenomenon that some people naively misconstrue as a “problem” helps me to relax right before I begin to stress over the realization that every component of my pantry now lies in my stomach.

Does this mean we should stop snacking? Blasphemy! Let’s not be overdramatic. I believe the best course of action is to simply choose foods that take longer to eat. 

Read my tips on foods that take longer to eat on goodbite